| |
|
Install Git on MAC
Install Git on MAC
After Linux now we focus on install Git on MAC. There are number of ways to install Git on mac. And this will comes inbuilt with Xcode or its other command-line tools. And to start Git you will open terminal and use the below command:-
$ git --version
When we run above command this will display the installed version of Git.
Output of above command
git version 2.24.0 (Apple Git-66)
And if there Git is not installed it will ask you to install it.
When we say support of Git in Apple, it lags by several major versions. We may install a newer version of Git using one of the following methods:
Git Install on MAC
Below process is the simplest way to download and installing the Git. And to install Git got to offical page of git download. And choose the option as display in below image for Mac OS X.
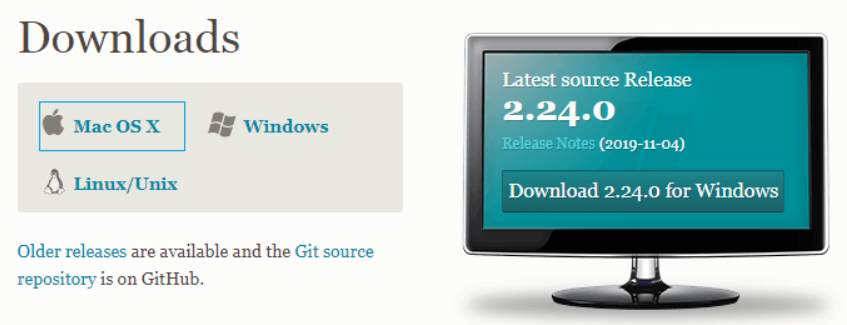
Here as per above image i have use version 2.24.0. Now we have many otehr latest version available now a days. You can choose the other latest version. Once you choose the "Mac OS X" the installer file will download to your system. And here you need to follow the prompt and choose the required installer option. Once the installation process is completed, you need to verify the installation by using the below command on the terminal:-
$ git --version
When we run above command this will display the installed version of Git.
Output of above command
git version 2.24.0 (Apple Git-66)
Now the Git is installed on your system. Now it's time to configure the version control system for the first use.
And to register a username you need to run the below command:
$ git config --global user.name "crackYourInterview"
And to register an email address for any autor you need to run the below command:
$ git config --global user.email "crackYourInterview2018@gmail.com"
And to get in-depth i will add the new chapter for git config command.
Installation via MacPorts
Sometimes MacPorts also referred to DarwinPorts. It makes the straightforward installation of software on the Mac OS and Darwin operating systems. If we have installed MacPorts for managing packages on OS X, follow the below steps to install Git.
Step1: Update MacPorts
And to update MacPorts you need to run the below command:
$ sudo port selfupdate
Step2: Search for the latest Ports
And to search most recent available Git ports and variants you need to run the below command
$ port search git
$ port variants git
And above two command will help you to search latest available port and option and will install it.
Step3: Install Git
To install Git we will run below command:
$ sudo port install git
We can also install some more extra tools with the Git. And some of these tools assist Git in different manners. And to install Git with bash completion, svn and the docs, you need to run the below command:-
$ sudo port install git +svn +doc +bash_completion +gitweb
Now after above command we have successfully installed Git with the help of MacPorts on our system.
Step4: Configure Git
And the next step to first use is to check git configuration.
And we will configure the Gir username and email address as same as given above.
And to register a username, run the below command:-
$ git config --global user.name "crackYourInterview"
And to register and email address for above given author we use below command:-
$ git config --global user.email "crackYourInterview2018@gmail.com"
Install Git via Homwbrew
When we say about the installation of Git in Homebrew it is used to make the software installation straight forward. If we have installed Homebrew for managing packages on OS X, follow the below steps to go with Git:-
Step1: install Git
First we need to run the terminal and run the below command to install Git using Homebrew:-
$ brew install git
Once we run above command this will install the Git on your machine. We need to verify the installation in next step.
Step2: verify the installation
It is essential to ensure that wheather the installation process has been succeeded or not.
To verify whether the installation has been successful or not, run the below command:
$ git --version
When we run above command this will display the installed version of Git.
Output of above command
git version 2.24.0
Step3: Configure Git
Now the register user step need to be incorporate here to register a username use below command:-
$ git config --global user.name "crackYourInterview"
And to register an email address for above given author we use below command
$ git config --global user.email "crackYourInterview@gmail.com" | |
|
|
|
|